Superhero Quilt Part Deux
This past year, I completed the superhero quilt for my son. As usual, I ended up with quite the surplus of extra fabric. I realized it would go to the scrap pile for an indefinite period of time if I didn't take action this summer while I have the opportunity before school starts. It helped that I had someone in mind as the recipient, so I got busy with a basic scrap quilt.
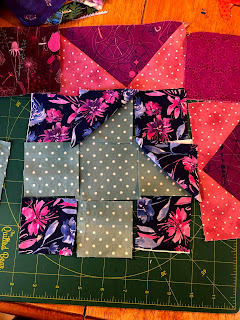
I just love the kaleidoscope of colors, especially the reds and blues!

So I got to cutting...just basic blocks. I went with an odd 5-3/4" block since I had leftovers from my son's quilt. That was large enough to capture the comic strip images.
I spent one day cutting and filling up the flannel design wall, then started the transfer to my machine with my handy transfer board to stitch up 6X6 block sections at a time.

This piecing stage went pretty quickly, thank goodness. There is some serious gratification in a quick-beginning-to-end quilt project. Most of my quilt projects have a timeline of one to three years to completion, but this one was finished in less than two weeks!
I was pretty disciplined with my machine, cleaning the bobbin area and adding some oil each time the bobbin ran out.

Finally, a completed quilt top. I decided to keep the busy-ness edge to edge. No border on this one.

My initial plan was to tie the quilt, so I picked up some floss.

Then on to the quilt sandwich stage. My table method with Lowes clamps works perfectly. The only drawback is that the family needs to find an alternative location for eating. They are, thank goodness, quite adaptable =).

This project was a happy one...how can you not look at all that color and not feel some joy?
When I was working on my son's quilt, we had Marvel movies playing in the background. This quilt was all about British detective shows on Britbox.

So much for the plan to tie this one! Once I had it layered, I felt like the low loft batting and the wider blocks would not be as stable with the tying. So I opted for the basic grid.

For the border, I tried a new technique...using the backing to fold onto the border. I trimmed the batting and cut the border one inch beyond the quilt top and then folded twice and clipped it all in place


This is the first time I used the machine to stitch a border. Part of me missed the hand stitching I usually do for a border. That is always my favorite part of the quilting process. I decided to try this out, and it worked perfectly! I just needed to take care to stitch as close to the edge as possible.

Here is my son's quilt, a bit larger, especially with the border.

And here is the twin size, finally finished. I tossed it in the wash and tumbled it dry. It will head to the post office today!

Of course, I had a simultaneous project interspersed with my work on the superhero quilt. Coming up next, Christmas in July!


Comments
Post a Comment