Christmas in July!
I picked up this fabric from Wilmington Prints last year, and I love, love, love it so much! The floral prints fill my heart with joy and the gold text print...just so, so holiday perfect! I knew I wanted to do some kind of scrappy quilt to bring all these beautiful colors together.
I meandered around Pinterest until I found a tutorial from the Missouri Star Quilt Company called "Double Slice Layer Cake". You can tell it is one of Jenny's earlier tutorials, but, as usual, she simplifies the process for the quilt top. I just knew I wanted something a bit more random than uniform squares.
Here is the link: https://www.youtube.com/watch?v=jxC-0T5lXw4&feature=share
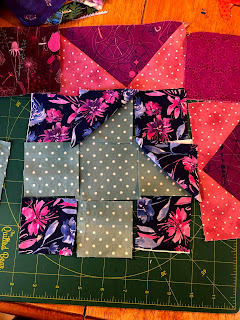
So I cut my fabrics into 10" squares, layer cake style, then cut, sewed, cut, and sewed (see the tutorial).
This was an easy one for chain piecing.
The quilt top came together very quickly. I find it interesting how the light interacts with these fabric combinations. The prints are a collection of warm and vibrant golds and greens and reds, but when I snapped the photo outside, the contrasts appear to be more stark with the black taking a dominant role.
I made the border with red polkadots wider on the sides and a bit thinner at the top. I felt like the quilt top was long enough to cover me head-to-toe already.
But speaking of the colors in the light... I took these two photos within seconds of one another. The breezy movement of the quilt totally changed the look of the colors from major contrasts to more of a softer muted blend.
First half basted, on to the second half.
Seriously, I love these colors so much!
And as if it could get any better...check out the awesome backing fabric I've had stashed for the last couple of years, knowing that the perfect project would need it one day.
Now, for this quilt, I actually hand tied the majority of it. There are two rectangle sizes repeated on the quilt design, so I cut out two pieces of paper to fit each, then I folded the papers and poked a hole to make it easy to find and mark the center of each rectangle with my fabric pencil.
I look like I am quilting super fast with that blurred hand action!
This was actually a nice and relaxing quilt tying adventure
.
Since free motion quilting is not my forte, I was nervous about topstitching the borders, but I found this idea for a new design...lots of twirling going on there. It works for me!
Another fortuitous moment when I realized I had the green polkadot on hand for the binding. I went with a three inch strip since the batting is high loft.
I will say this every time...my favorite part of the quilt process is stitching the binding. I watched quite a few episodes of Father Brown during this phase.
I had to take a few hours off from stitching since the peaches from our tree were ready for their transformation into peach salsa. Yummy.
All washed and dried and ready to use. I am seriously going to start using this one even before summer ends. There are no rules that say I have to wait until the holiday season.
Wouldn't you know it...five inches short on the backing fabric, but, as luck would have it, I had just that amount left over with one of the floral fabrics.
I think it added a nice touch. Just more wonderful color!
Have I mentioned yet how much I love the colors in this quilt?
I love the mix of tying the center of the quilt and free motion stitching the borders. With the ties, the middle is so nice and fluffy.
And, thank goodness, Happy approves. She is pretty weary from a walk we took earlier, so she wasn't in the mood to do her typical quilt pose.


Comments
Post a Comment